
How to create a quick sales return
19/06/15 07:17 Filed in: Dynamics GP | Sales
Sometimes it is the simpler functions that users miss. Such could be the case for sales returns. When creating a return, many users don't know a very nice sales returns feature provided by Dynamics GP. Since version 2010 Microsoft unleashed some of the functionality of the Field Service module so that users could take advantage of it in other modules, and one of them is a quick sales returns function described here.
The sales returns functionality incorporated into GP allows the users to quickly select the originating sales order, items and even serial/lot numbers and let Dynamics GP create the sales order for you. So, let me show you…
HOW TO CREATE A SALES RETURN
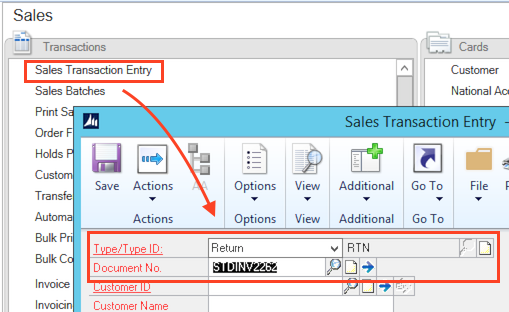
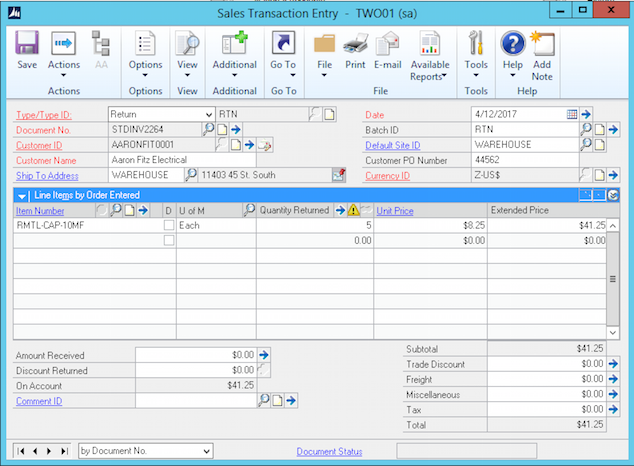
1. Create the Sales Order Return Document
From the sales page, select Sales Transaction Entry, select the "Return" document type and document type ID. Then, make sure to enter or accept default document number.
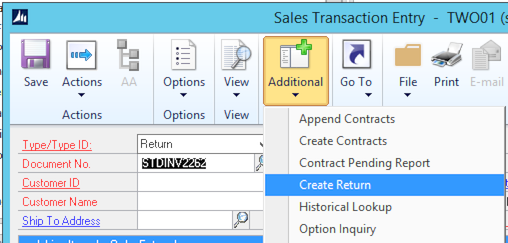
2. From the Additional menu, select “Create Return” command.
This command is available in the "Additional" menu, shown here in "ribbon" style and was originally envisioned to provide Return Merchandise Authorization (RMA) functionality related to the Field Service module. Since GP2010, the function was enabled to create non-field service returns as well and provide the quickest and most practical way of entering returns.
When selecting this option, you may get an error "The RMA type selected is invalid for this process". You may disregard this error as it has no impact on creating the return as specified in this blog.
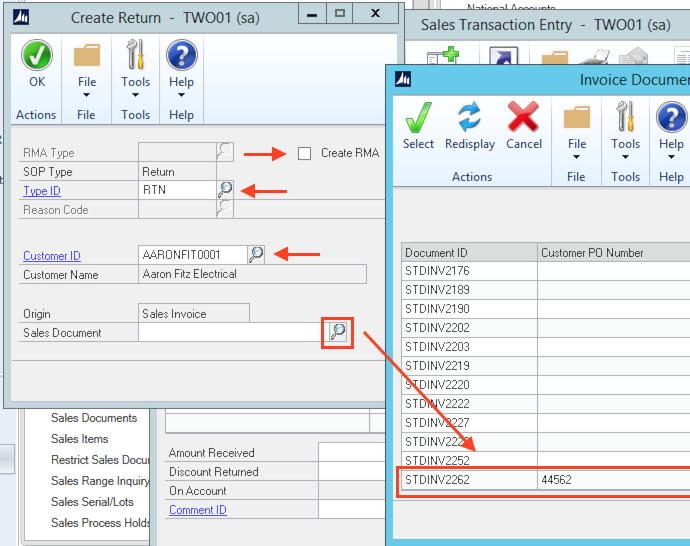
3. Specify parameters to create the return, including the selection of the original invoice that contains the items being returned, in the “Create Return” window.
You need to unmark the "Create RMA" checkbox since this return will not be related to the field service functionality. Then verify the return type ID is the correct one (should default from the sales document), and select the customer ID. The lookup button from the sales document field will allow you to browse all sales documents for this customer so you can select the specific sales document from which the items are being returned.
4. Select the item(s) and quantity being returned in the “Sales Invoice Return Item Selection” window.
Dynamics will then present you with a window where the items and quantities from the selected sales order are shown. You need to mark the checkbox by the item(s) that are being returned and enter the quantity being returned in each line as shown here:

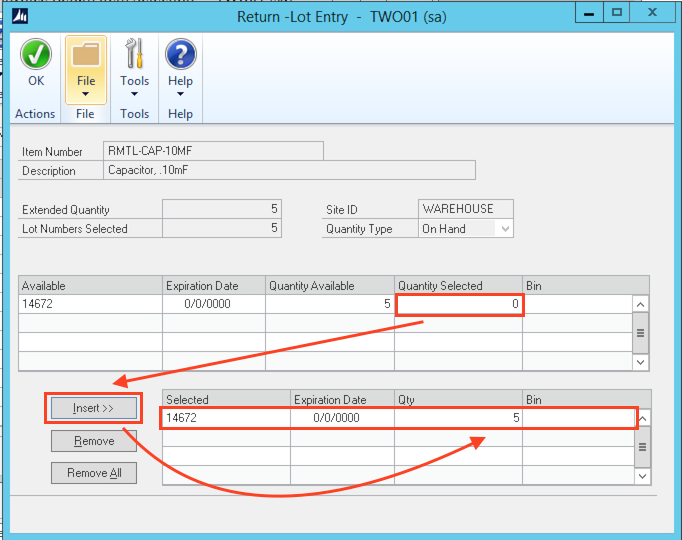
5. If the item is serial or lot tracked, the Return Serial Entry or the Return Lot Entry will automatically open. Here you need to select the correct quantities from the correct serial or lot numbers. The original serial/lot numbers will show for you in this window.
Enter the quantity being returned from the correct “available” serial/lot number, then insert the quantity into the “selected” area and repeat the process if there are multiple serial/lot numbers.
6. After selecting serial/lot numbers, you will be returned to the “Sales Invoice Return Item Selection” window.
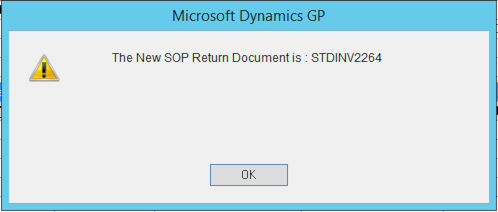
Post the return and you will see a message when the process is finished, and your return will be done.

The sales returns functionality incorporated into GP allows the users to quickly select the originating sales order, items and even serial/lot numbers and let Dynamics GP create the sales order for you. So, let me show you…
HOW TO CREATE A SALES RETURN
1. Create the Sales Order Return Document
From the sales page, select Sales Transaction Entry, select the "Return" document type and document type ID. Then, make sure to enter or accept default document number.
2. From the Additional menu, select “Create Return” command.
This command is available in the "Additional" menu, shown here in "ribbon" style and was originally envisioned to provide Return Merchandise Authorization (RMA) functionality related to the Field Service module. Since GP2010, the function was enabled to create non-field service returns as well and provide the quickest and most practical way of entering returns.
When selecting this option, you may get an error "The RMA type selected is invalid for this process". You may disregard this error as it has no impact on creating the return as specified in this blog.
3. Specify parameters to create the return, including the selection of the original invoice that contains the items being returned, in the “Create Return” window.
You need to unmark the "Create RMA" checkbox since this return will not be related to the field service functionality. Then verify the return type ID is the correct one (should default from the sales document), and select the customer ID. The lookup button from the sales document field will allow you to browse all sales documents for this customer so you can select the specific sales document from which the items are being returned.
4. Select the item(s) and quantity being returned in the “Sales Invoice Return Item Selection” window.
Dynamics will then present you with a window where the items and quantities from the selected sales order are shown. You need to mark the checkbox by the item(s) that are being returned and enter the quantity being returned in each line as shown here:
5. If the item is serial or lot tracked, the Return Serial Entry or the Return Lot Entry will automatically open. Here you need to select the correct quantities from the correct serial or lot numbers. The original serial/lot numbers will show for you in this window.
Enter the quantity being returned from the correct “available” serial/lot number, then insert the quantity into the “selected” area and repeat the process if there are multiple serial/lot numbers.
6. After selecting serial/lot numbers, you will be returned to the “Sales Invoice Return Item Selection” window.
Post the return and you will see a message when the process is finished, and your return will be done.